Friday, December 30, 2011

Chocolate Celebration Cake

We are just hours away from the new year and I'm rushing to get one last recipe onto this blog before the clock strikes 12. Why? Because I'll be doing my top 12 recipes of 2011 soon and this cake will be on the list! I bake several cakes a year and I've made and tasted several recipes for chocolate cake in my lifetime and this is one of the best I've ever eaten. The recipe was given to me by my cyber friend, China, (hi China!) and I'm so grateful for it. Her husband made this cake for her birthday this summer and she raved about it. I read the reviews online and so did everyone else.

Happy Birthday M!

I baked this chocolate cake for a very special lady, my mother-in-laws' ex sister-in-law. Let's call her M. M was married to Mr. H's uncle many years ago. Got that? He (the uncle not Mr. H) is kind of a loser (haha!) so we ditched him and kept her after their divorce. She really does feel like part of the family. Scratch that, she is part of the family and this year for her birthday she decided to spend it with us, which gave me the opportunity to bake a birthday cake. Together with my mother-in-law we prepared dinner and dessert. She requested "anything chocolate" so I turned to this recipe by Gale Gand.

This cake makes a lot of batter and produces a large cake. The one thing that makes this cake unique is that it is made with all brown sugar- 3 cups to be exact. Yes, that's a lot of sugar but it makes a lot of cake too. It was mighty tasty and moist thanks to the addition of sour cream. It also has hot coffee in the batter, but you could substitute hot water if you like. The coffee just brings out the intensity of the chocolate without actually tasting it. I happen to like coffee and chocolate together so I paired it with a mocha cream cheese frosting. The combination was killer good. And as I mentioned it's making my top 12 list of 2011 so you know it's a good recipe. If you're needing a new chocolate cake recipe, I sincerely hope you'll give this one a try. You don't even need to use my frosting recipe, any frosting will do or heck, just eat it plain. But please put it on your list of things to make this upcoming year, hopefully sooner than later.

Chocolate Layer Cake from Gale Gand via Food Network

Printer Friendly Version
  • 1 cup (2 sticks) unsalted butter, softened at room temperature
  • 3 cups light brown sugar, packed
  • 4 eggs
  • 2 teaspoons pure vanilla extract
  • 3/4 cup unsweetened cocoa powder
  • 1 tablespoon baking soda
  • 1/2 teaspoon salt
  • 3 cups sifted cake flour
  • 1 1/3 cups sour cream
  • 1 1/2 cups hot coffee

Preheat the oven to 350 degrees. Butter and flour 3 (9-inch) cake pans. Cut 3 circles of waxed paper or parchment paper to fit the bottoms of the pans, then press them in.

In a mixer fitted with a whisk attachment (or using a hand mixer), cream the butter until smooth. Add the sugar and eggs and mix until fluffy, about 3 minutes. Add the vanilla, cocoa, baking soda and salt and mix. Add 1/2 of the flour, then 1/2 of the sour cream and mix. Repeat with the remaining flour and sour cream. Drizzle in the hot coffee and mix until smooth. The batter will be thin.

Pour into the prepared pans and bake until the tops are firm to the touch and a toothpick inserted into the center comes out clean (a few crumbs are okay), about 35 minutes. Halfway through the baking, quickly rotate the pans in the oven to ensure even baking, but otherwise try not to open the oven.

Let cool in the pan 10 minutes. Turn out onto wire racks and let cool completely before frosting.

Mocha Cream Cheese Frosting by Monica h

  • 1/2 cup (1 stick) unsalted butter, room temperature
  • 8 ounces cream cheese, room temperature
  • 1 teaspoon espresso powder
  • 1/2 cocoa powder
  • 2 teaspoons vanilla
  • 3-4 cups powdered sugar
  • 2-3 Tablespoons heavy cream

In a large bowl, cream butter and cream cheese and mix until light and fluffy. Scrape down the bowl if necessary.

Add the cocoa and espresso powder and beat on low until just combined then add the vanilla and mix thoroughly.

Gradually add powdered sugar one cup at a time, scraping down the bowl if necessary. Start with 3 cups adding more if necessary. Once frosting is sweetened, thick and creamy add the heavy cream and mix on medium speed- the frosting will thicken slightly. Don't overwhip once you've added the cream.

Frost cooled cake layers. Refrigerate any leftover frosting. Refrigerate any frosted cake, but eat at room temperature for best flavor and texture.

Thank you for making 2011 such a memorable year for Lick The Bowl Good. I'm looking forward to another year of baking and licking bowls with you all. Happy New Year!

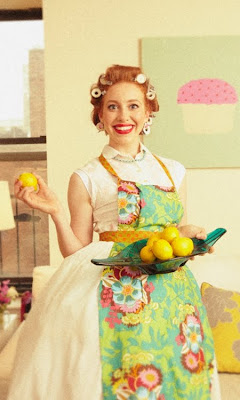
Oh, and the winner of the Shabby Apple apron is Julie of Fruitcake In The Kitchen. Congrats Julie!

Sunday, December 25, 2011

Merry Christmas!

Wishing you and yours peace on this Christmas day.

~ Mr. H, Hayden and Monica

Thursday, December 22, 2011

Cranberry Raisinets and A Shabby Apple Giveaway (CLOSED)

December has flown by and Christmas is quickly sneaking up on me. Stop the time- I'm not ready! I need another 4 weeks to get ready, decorate the house, wraps gifts, send out cards and do my holiday baking. Surprisingly (or not) I haven't made a single cookie this month. Heck, my Christmas tree just got decorated yesterday! True story. Usually by this time of year, I have a stash of baked goods already in the freezer ready to be placed into cookie boxes. This year my freezer holds nothing but cartons of half eaten ice cream, frozen meals and a backstock of breastmilk. haha!

I did, however, make these cookie bars last week to take to my in-laws house for dinner. I discovered that Raisinets now makes a cranberry version and I couldn't wait to bake them into something. Instead of raisins covered in milk chocolate, they're dried cranberries in milk chocolate and they were really good. Very similar to the original, but a little more tart.

I bought a couple bags (found in the candy aisle) and incorporated them into some chewy buttery oatmeal bars. I added a handful of vibrant dried cranberries to the batter for color and added flavor. To say I liked them was an understatement. This entire pan was gone in 2 days. Just looking at the pictures makes me want to make them again. I bet they'd be good warmed slightly with a scoop of vanilla on top too. Good thing, I have some in the freezer. I'll just have to make another batch of these bars!

And the winner of Sugar, Sugar: Every Recipe Has A Story is #45 Jeanette of The Whimsical Cupcake. Congratulations Jeanette! I enjoyed your story about your meatball mishap and hope you enjoy this book. Please email me with your address and this book will be shipped out to you. For another giveaway, head down below.

Chocolate Cranberry Oat Bars adapted from Quaker and Monica h

Printer Friendly Version

  • 1 cup (2 sticks) unsalted butter, softened
  • 3/4 cup firmly packed brown sugar
  • 1/2 cup granulated sugar
  • 2 eggs
  • 1 teaspoon vanilla
  • 1 1/2 cups all-purpose flour
  • 1 teaspoon baking soda
  • 1 teaspoon ground cinnamon
  • 1/2 teaspoon salt
  • 3 cups Quaker Oats (old fashioned, uncooked)
  • 1 cup Cranberry Raisinets
  • 1/2 cup dried cranberries

Heat oven to 350°F.

In large bowl, beat butter and sugars on medium speed of electric mixer until creamy. Add eggs and vanilla; beat well.

Add combined flour, baking soda, cinnamon and salt; mix well. Add oats, Cranberry Raisinets and dried cranberries; mix well.

Press dough onto bottom of an ungreased 9x13-inch baking pan. Bake 30 to 35 minutes or until light golden brown. Cool completely in pan on wire rack.

Cut into bars. Store tightly covered at room temperature.

The generous folks at Shabby Apple would like to offer one of the readers here at Lick The Bowl Good one of their beautiful aprons! How cool is that?! Shabby Apple is an online boutique of women's dresses, aprons and accessories. They have such beautiful things and I could truly spend all day adding things to my cart on their site. But today we're talking aprons so let's get on with the giveaway. Their vintage-inspired cheery aprons are a part of the Boysenberry Pie Collection and each apron comes complete with a recipe for its namesake dessert. Click HERE to see their beautiful aprons. I am partial to the Wildberry Pie apron- so pretty!

In order to enter this giveaway, there are a few things you must do.

  1. You must "Like" Shabby Apple on Facebook- http://www.facebook.com/pages/Shabby-Apple/56291792791
  2. Go to ShabbyApple.com and pick your favorite apron, then come back here and leave me a comment on this post telling me you "liked" them on Facebook and which apron you would like to have.

Winner must have a USA shipping address to be eligible for entry. Winner will be chosen in a few days. Best of luck!

Monday, December 19, 2011

"Sugar, Sugar" Book Review and Giveaway (CLOSED)

I was contacted a couple months ago and asked if I'd like to receive a complimentary copy of a new dessert cookbook called Sugar, Sugar: Every Recipe Has A Story by Kimberly Reiner and Jenna Sanz-Agero. Well I love sugar so I said yes!

I was excited to get my hands on this book because it reminded me of a modern version of my favorite community cookbook. The book is broken up into 7 chapters- the first telling you about the book and the "sugar momma" authors and how the book came about, and then came the recipes categorized by type of dessert- Cakes, Tarts and Pies, Cookies, Bars, Confections and Recipe Legacies. You see, each recipe is contributed by someone else, much like a community cookbook. Because the recipes are submitted by other people, they are not all from scratch, some of them contain shortcut ingredients, such as boxed cake mix and canned pie filling. But this book is more than just a collection of recipes because each entry also has a short story accompanying it. The stories were funny, sweet and sentimental. Some were about the celebrations in which they were served, some were about the people and hands that made them. The one constant is that this books bring life to the recipes.

Another thing I liked about this book was that the authors leave you "Sugar Momma Tips" about the recipes, like how to turn these bars back into a pie, or how to how to make the recipe your own by swapping out ingredients. They also give you tips on how to speed up the recipe if you're pressed for time. On top of all that, there is a section for note taking, so you can jot down comments or changes you made to the recipe, much like grandma would have done in her own handwriting on a recipe card.

When it came down to deciding what to make for this review, I decided on a caramel cake. As you can see, that is not what I have here. I found the cake to be cloyingly sweet and just couldn't eat it. I tried to pass it off onto others and they all said the same thing. It had great buttery caramel flavor, just way too much sugar. But then again, it comes from a book where the word "sugar" appears twice in the title. I turned to these Kentucky Pie Bars, because we love Derby Pie and I liked that these could be made in bar form with a graham cracker crust. These were just like the pie I make and not too sweet. They were like a cross between a magic cookie bar and Derby Pie. I would definitely make these bars again, but I would add more Bourbon to the filling (I added the lesser amount) and add a bit more butter to the crust to help bind it together since I found them to be a little crumbly. I also have my mind set on making the cover recipe as well as a pie and another bar cookie recipe, so stay tuned.

Kentucky Derby Pie Bars slightly adapted from Sugar, Sugar

Printer Friendly Version

Graham Cracker Crust:

  • 2 cups graham cracker crumbs
  • 1/2 cup (1 stick) butter, melted

Filling:

  • 1 cup granulated sugar
  • 1/2 cup (1 stick) butter, melted and cooled
  • 2 large eggs
  • 1 teaspoon vanilla
  • 3-4 Tablespoons Bourbon, optional
  • 1/2 cup all purpose flour
  • 1 cup chopped pecans
  • 1 cup semi-sweet chocolate chips

Preheat the oven to 325 degrees F. Butter a 9x13-inch baking dish (or use non-stick cooking spray).

To make the crust: Place the graham crackers and the melted butter in a medium bowl and mix together until the crumbs are thoroughly moistened. Press mixture firmly and evenly on the bottom of the baking dish and set aside.

To make the filling: Place the sugar and butter in a large bowl. With an electric mixer, beat mixture on medium speed until well combined. Reduce the mixer speed to low and the eggs ones at a time, add the vanilla and Bourbon, if using. Gradually add the flour until just combined. Use a wooden spoon or spatula to fold in the pecans and chocolate chips. Pour the filling on top of the crust and spread it evenly.

Bake for 33-38 minutes, until the bars begin to turn a light golden brown. Remove from the oven and let them cool before cutting. Or eat them while still warm and gooey.

Now for the giveaway. The publishers and I want you to have your very own copy of Sugar, Sugar: Every Recipe Has A Story. To enter, all you have to do is leave a comment on this post. For a second entry and in the spirit of this book, leave a seperate comment telling me a brief story about one of your favorite recipes. That's it!

I'll pick a winner in a couple days and the folks at Andrews McNeel Publishing will send a book straight out to that individual. Good luck and happy story telling!

Sunday, December 11, 2011

M-I-C-K-E-Y

For the past 3 years, I have made the birthday cake for the boys I was a nanny for. I made a sea themed cake, a Wonder Pets cake, a Dinosaur cake and this year the theme was Pirate Mickey! In the past, I've spent countless hours thinking of the cake, drawing it out, then finally baking and decorating. Time was never as issue for me until this year. My mom came over to help out with Hayden, but a child needs his momma and I had to take frequent breaks to coo with him. Speaking of Hayden, my friend got mad at me for not sharing a picture of him a couple posts back, so here he is. This is one of my favorites.

The boys wanted a pirate ship cake complete with a flag, treasure chest, dolphin and sea turtle cupcakes. They wanted Donald Duck, Minnie and Pluto there too. Well I just couldn't commit to doing that this year so I did a dessert table instead. Yes, that's still a lot of work but it was broken up over the course of two days and I wasn't spending the bulk of my day decorating with mouse ears. I made a 9-inch Mickey Mouse cake as well as Oreo cupcakes, sugar cookie bars, a Giant m&m cookie and rice krispy treats. Today I will share the recipes for the cake and the cupcakes.

The main birthday cake was vanilla buttermilk cake with strawberry jam between the layers and iced in cream cheese frosting. The Micky decoration is made up of fondant. This is the same recipe I've made every year and the kids' mother just loves it and requests it every time. I've shared this recipe before but there's now a printable link below. The cupcakes start off with Hershey's "Perfectly Chocolate" cake recipe. I intended to put chopped up Oreos in the batter but forgot about it until I had already stuck them in the oven. Perhaps you can give that a try. The frosting was a basic buttercream with finely chopped Oreos in it. I used a mixture of shortening and butter for the frosting for flavor and stability. It was light and creamy, wasn't too sweet and really did taste like an Oreo. I'll be making these again!

Hershey's "Perfectly Chocolate" Chocolate Cupcakes

Printer Friendly Version

  • 2 cups sugar
  • 1 3/4 cups all purpose flour
  • 3/4 cup Hershey's Cocoa
  • 1 1/2 teaspoons baking powder
  • 1 1/2 teaspoons baking soda
  • 1 teaspoon salt
  • 2 eggs
  • 1 cup milk
  • 1/2 cup vegetable oil
  • 2 teaspoons vanilla extract
  • 1 cup boiling water

Heat oven to 350°F. Line muffin cups (2-1/2 inches in diameter) with paper bake cups and set aside.

Stir together sugar, flour, cocoa, baking powder, baking soda and salt in large bowl. Add eggs, milk, oil and vanilla; beat on medium speed for 2 minutes. Stir in boiling water (batter will be thin).

Fill cups 2/3 full with batter. Bake 22 to 25 minutes. Cool completely before frosting.

Makes about 24-30 cupcakes.

Oreo Buttercream from Monica H

  • 1/2 cup unsalted butter, room temperature
  • 1/2 cup shortening or butter
  • 1 teaspoon vanilla extract
  • 2 Tablespoons milk
  • 3-4 cups powdered sugar
  • 14 Oreos, finely crushed in food processor

In a large bowl, cream butter, shortening, vanilla, and milk.

Add powdered sugar until desired sweetness is achieved, anywhere between 3 and 4 cups. Mix in crushed Oreos until well combined.

If your frosting is too thick, add a tad more milk to thin. If it's too thin to pipe with, add more sugar until it's the texture you want.

This is enough buttercream to frost a layer cake or about 30 cupcakes.

Vanilla Buttermilk Cake from Sky High: Irresistible Triple-Layer Cakes

Printer Friendly Version

Makes an 8-inch triple-layer cake

  • 4 whole eggs
  • 2 egg yolks
  • 2 teaspoons vanilla extract
  • 1 1/4 cups buttermilk
  • 3 cups cake flour
  • 2 cups sugar
  • 4 1/2 teaspoons baking powder
  • 1/2 teaspoon salt
  • 2 sticks unsalted butter, at room temperature

Preheat the oven to 350 degrees. Butter the bottoms and sides of three 8-inch round cake pans or spray to coat with nonstick cooking spray. Line the bottom of each pan with a round of parchment or waxed paper and grease the paper.

Put the eggs and yolks in a medium mixing bowl, add the vanilla and ¼ cup of the buttermilk. Whisk to blend well.

Combine the flour, sugar, baking powder and salt in a large mixer bowl; whisk to blend. Add the butter and the remaining 1 cup buttermilk to these dry ingredients, and with the mixer on low, blend together. Raise the mixer speed to medium and beat until light and fluffy, about 2 minutes.

Add the egg mixture in 3 additions, scraping down the sides of the bowl and mixing only until thoroughly incorporated. Divide the batter among the three prepared pan.

Bake the cake layers for 28 to 32 minutes, or until a cake tester inserted in the center comes out clean and the cake begins to pull away from the sides of the pan. Let the layers cool in the pans for 10 minutes; then carefully turn out onto wire racks, peel off the paper liners and let cool completely.

NOTE: This can be made in 3 9-inch pans, but the baking times will vary slightly, so keep an eye on them.

Saturday, December 3, 2011

A Festive Bundt and Hayden Turns 3 Months Old

I realize it's already December and no one is talking about Thanksgiving anymore. But this year we were lucky enough to celebrate Turkey Day twice! My aunt and uncle hosted a post Thanksgiving dinner at their house the day after Black Friday, which was nice because they had a smoked turkey, and a few different side dishes than we usually have- including squash casserole and shrimp stuffing. It was a casual affair as everyone brought leftovers to gobble up- my contribution was mashed potatoes, cranberry sauce and this cake. It was kind of a last minute idea, but I hope it's a tradition we can keep up.

I made this about an hour before I had to leave to go to my aunts' house. I wasn't sure what I was going to make but I browsed through my trusty Bundt cookbook and this cake called out to me. It uses a boxed cake mix as the base, which was fine by me since I was already running behind and didn't have time to soften and cream butter. I was also holding Hayden while making this cake, so at least you know it's easy! It also incorporates egg nog and rum, which is a no brainer because not only festive but I love baking with booze. I don't drink it, but it's more than welcome in my cakes :-).

This recipe has you butter a Bundt pan and press sliced almonds up the sides of the pan. I was going to omit the nuts, but I'm so glad I left them in. The almonds create a buttery, slightly crunchy crust to the moist and tender cake. There's a full cup of egg nog in this cake, but if you chose to omit the rum, then you can just add equal parts egg nog and add a little rum extract. But don't forget to add the nutmeg, that's what makes this cake special. This cake is pretty enough for holiday gatherings but simple enough to cut a big hunk off and eat with your hands. In fact that's how a few of my family members ate this cake last week, and that's quite okay by me. If you try this cake, I hope you like it. Even my eggnog hater husband liked this cake.

Egg Nog Bundt Cake from Bundt Classics

Printer Friendly Version

  • 2 Tablespoons butter, softened
  • 1/2 cup sliced almonds
  • 1 (18.25 oz.) package yellow cake mix
  • 1 cup egg nog
  • 1/3 cup vegetable oil
  • 1/2 cup rum*
  • 3 eggs
  • 1/2 teaspoon freshly ground nutmeg

Heat oven to 325 degrees F.

Grease a 12 cup Bundt Pan with 2 tablespoons of butter (do not use cooking spray). Press almonds on the bottom and up the sides of the pan.

In a large mixing bowl, mix all remaining ingredients. Mix on medium speed for 2 minutes. Carefully spoon batter into prepared pan.

Bakefor 55-64 minutes or until a toothpick inserted into the center of the cake comes out clean.

Cool for 10 minutes in pan, then remove and cool completely on a wire rack.

*NOTE: I used a combination of light and dark rum. If you don't want to use alcohol in this cake, substitute the 1/2 cup rum with equal parts egg nog and add 1/2 to 1 teaspoon rum extract to the batter.

My sweet boy turned three months old this past Thursday. It's hard to believe how much he's grown sometimes. He's a full two feet long and 14 pounds. I put him on my kitchen scale to weigh him and my scale got confused and gave me a blank reading. Come to find out, my scale isn't able to carry that much weight, so I had to stand on the regular scale, then put him on it to figure out how much he weighed. haha! He's my little chunky monkey and I'm so proud of him and proud to be his momma. Feeding him breastmilk is so rewarding for me because I feel like I'm solely responsible for his survival. Does that make sense? I put those fat rolls there. I am contributing to those chubby hands and feet and I just love it- it makes all the hard work so worth it. Speaking of hands...the boy LOVES his hands. He wants to eat them and play with them and he rub them all the time. He reminds me of a little old man sitting in a recliner rubbing his hands together. He is such a little lover.

Tuesday, November 29, 2011

A Can Of Pumpkin

Are you tired of pumpkin yet? How 'bout one more recipe? I was supposed to share this pumpkin cheesecake with you all last Sunday for The Cake Slice Bakers, but I waited to make this for Thanksgiving so I'm just now getting to it. I hope you'll forgive my tardiness!

When I moved out on my own into my first apartment (in 2000) I scoured my mom's pantry for canned goods and staples to take along with me. Part of my stash included a can of pumpkin puree. I didn't bake much back then but my mom wasn't going to use it, so I figured 'why not?'. Well 3 years later, Mister H and I got a place together and the can of unused pumpkin came along with us.

Fast forward to November 2005 and we are newlyweds and living in our new house! We decided that we wanted to host our first Thanksgiving in our home for all of our family- 16 in total. I prepped, chopped, basted, baked and mixed in preparation for that day. At 10 pm Thanksgiving Eve I brought out my trusty can of pumpkin puree in order to make a homemade pumpkin pie. I opened the can and the puree had turned army green! It was disgusting and hilarious at the same time. I promptly sent my hubby along with my Dad, who had come in town for the holiday, to the grocery store for a couple more fresh cans. They saved the day and I learned my lesson- canned pumpkin doesn't last through 3 moves. ha!

And in case you're wondering, I used a fresh can of pumpkin for this cheesecake. You can tell because my cheesecake is autumn hued and not mossy green. :-) It was creamy and fluffy, a little spicy and pumpkin-y, but not overwhelmingly so. I decided to make my own crust because the original called for ground pecans (which my cousin is allergic to) and crystallized ginger (which I don't like). I opted for a buttery oatmeal cookie crust with cinnamon in lieu of graham crackers and it was delicious. I garnished my cake with toasted pumpkin seeds and sweetened whipped cream. I tasted it at room temperature, but it was best eaten cold right out of the fridge. If you're not totally over pumpkin, I hope you'll give this a try.

Pumpkin Cheesecake with an Oatmeal Cookie Crust recipes from The Cake Book and Monica h

Printer Friendly Version

For the Crust:

  • 1 1/2 cups finely ground oatmeal cookie crumbs (about 12 cookies or half of a 12.5 ounce package of Mother's Oatmeal Cookies)
  • 1/2 teaspoon ground cinnamon
  • 4 tablespoons unsalted butter, melted

For the Filling:

  • 1 cup pumpkin puree
  • 1/2 cup heavy cream
  • 2 teaspoons pure vanilla extract
  • 1 teaspoon ground cinnamon
  • 1/2 teaspoon ground ginger
  • 1/4 teaspoon freshly grated nutmeg
  • 1/4 teaspoon salt
  • 1 1/4 pounds (20 ounces) cream cheese, softened
  • 1/2 cup granulated sugar
  • 1/2 cup firmly packed light brown sugar
  • 1 tablespoon cornstarch
  • 4 large eggs

For the Crust: Position a rack in the center of the oven. Preheat oven to 350 degrees F.

Spray a 9x3 inch springform pan with baking spray. Cut an 18 inch square of heavy duty aluminum foil and wrap the foil around the outside of the pan. Set aside.

Place cookies in the bowl of a food processor and pulse cookies until they're finely ground.

Transfer the crumbs to a medium bowl along with ground cinnamon and mix together. Add melted butter to crumbs and mix til all the crumbs are well coated.

Press crumb mixture into an even layer over the bottom of the prepared pan.

Bake for 8-10 minutes or until crust turns golden brown.

Place the pan on a wire rack and allow to cool completely.

For the Filling: Reduce oven heat to 325 degrees F.

In a medium mixing bowl, whisk together the pumpkin puree, heavy cream, vanilla extract, cinnamon, ginger, nutmeg, and salt until well combined.

In the bowl of an electric mixer, using the paddle attachment, beat the cream cheese on medium low speed until creamy, about 2 minutes. Scrape down sides and bottom of bowl as necessary.

Gradually add the sugars and beat until blended.

Add the eggs, one at a time, mixing well after each addition. Scrape down sides of bowl as necessary.

Add the pumpkin mixture and mix until blended. Then add the cornstarch and mix until just combined.

Pour the batter into the cooled crust.

Place the pan in a large roasting pan. Fill the pan with enough water to reach 1 inch up the sides of the springform pan.

Bake in the water bath for 70 to 80 minutes, or until the center of the cake is set but slightly wobbly (the cake will set completely as it cools).

Remove the cake pan from the water bath. Place the pan on a wire rack. Carefully remove the foil from the pan.

Immediately run the tip of a paring knife around the sides of the pan, to prevent the top of the cheesecake from cracking.

Let the cake cool completely then refrigerate for at least 4 hours or overnight before serving.

Garnish with toasted pumpkin seeds and whipped cream.

Wednesday, November 23, 2011

Giving Thanks

Creamy pumpkin layered with maple soaked graham crackers and whipped cream, topped with buttery maple pecans. Yes please! A few weeks ago I hosted a Pampered Chef party with a few friends and close family. We fooled around in the kitchen, played with our food and ate this maple pumpkin trifle for dessert while flipping through catalogs. This trifle was simple to put together and would be a nice and different addition to your Thanksgiving meal, if you're still looking for a special dessert. It can be assembled the night before or even the morning of the big day, if you can find time to put this together :-)

As the family baker, Thanksgiving is a fun time for me. I love that I can bake anything and multiple things and it all goes. This year I'm making a pumpkin cheesecake, chocolate chip pecan pies and an apple cake with brown sugar glaze. My sister is making pumpkin crunch cake and my aunt is making not yo mama's banana pudding. We will be eating well and finishing it off with sweets galore. We are not doing without and we are extremely thankful for our bounty. Now I want to know what YOU are baking up for turkey day?

Pumpkin Maple Trifle adapted from Pampered Chef via Jolts & Jollies

Printer Friendly Version

  • 2 Tablespoons butter
  • 1 cup chopped walnuts or pecans
  • 1/2 cup plus 6 Tablespoons pure maple syrup
  • 1 box (14.4 ounces) whole graham crackers
  • 1 package (3.4 ounce) cheesecake instant pudding
  • 1/2 cup milk
  • 1 can (15 ounces) pumpkin puree
  • 2 teaspoons ground cinnamon
  • 1 container (12 ounces) frozen whipped topping, thawed or equal amounts of whipped cream

Make the maple pecans: Combine butter and 3 Tablespoons maple syrup in a saucepan. Cook on medium heat until butter melts. Add nuts and stir constantly about 5-7 minutes or until pecans are evenly toasted. Place on parchment paper and allow to cool.

Break up graham crackers and place in a large mixing bowl.

Pour 1/2 cup of maple syrup into a microwave safe bowl and heat in the microwave for 60 seconds. Pour syrup over graham crackers and toss to evenly coat. Set aside.

In a medium mixing bowl, whisk together pudding mix and milk until well combined. Add pumpkin puree and cinnamon. Mix to combine. Fold in 2 cups of whipped topping or whipped cream until there are no more white streaks. Set aside.

In a small bowl, combine the remaining whipped topping and remaining 3 Tablespoons maple syrup and fold until well blended.

Fill a decorator bag with 2/3 cup of the maple cream and set aside.

Assemble trifle: Place 1/3 graham crackers evenly in the bottom of a trifle bowl. Top graham cracker layer evenly with 1/2 the pumpkin filling. Top with 1/3 graham crackers. Top with remaining maple cream. Top with final 1/3 graham crackers. Top with remaining pumpkin filling. Break up maple nuts. Decorate the top of the trifle with the decorator bag of maple cream and the maple walnuts.

Refrigerate trifle for 4 hours or overnight.

I'm grateful and thankful for many things this year. But 2011 is different since we were blessed by the birth of Hayden. We prayed, hoped and waited for him for 6 years and lost 2 beautiful sons in the process. Hayden will never replace his angel brothers, Sam and Jack, but he more than makes up for the heartache and countless tears we shed along the way. I love him more than I ever thought possible.

What are you especially grateful for this year?

Thursday, November 17, 2011

Pie and A Friendly Armadillo

I don't have a lot of time these days to get on the computer but I often have my iPhone by my side to play games, text, send family and friends pictures of Hayden and to check my email. For the past few years I've subscribed to the daily holiday emails from Better Homes and Gardens. This year they started posting slideshows to accompany their recipes and this particular pie caught my eye. Hey that rhymes!

The only thing is, since my time is limited in the kitchen, recipes have to be simple and quick. This pie was both. And Mr. H even got in the kitchen with me and helped! He mixed up the filling while I made the pie crust. This pie was in the oven within minutes. A short time later, it was smelling quite delicious, nutty with a hint of coffee liquor. Yes, there's Kahlua in this pie and it was a nice change from the ordinary pecan pie. I've added Bourbon to my pecan pies before but I never thought of adding Kahlua before. I quite liked the combination of pecans, chocolate, and coffee notes. Mr. H liked it because it was not as gooey as most pecan pies, which meant that it cut nicely and was sturdier. If you're not a fan of sticky and gooey, than you might like this pie.

On to the armadillo part of this post. haha! That's an odd combination- pie and armadillos. You see, we have a pet armadillo. Well not really. It's not a pet, but it is taking up residence under our shed and we welcome it because it's eating grub worms in the yard and Autumn likes to chase it around the yard. She's quite entertained by him. This past week, Maranda and her daughter (Little Butt) came over. LB wanted to see the armadillo and hoped he was purple because that's her favorite color. Unfortunately, the armadillo didn't make an appearance while they visited, but I promised her I'd share pictures on here for her. I hope you like our little friend!

Chocolate Chip Pecan Pie with Kahlua slightly adapted from BHG

Printer Friendly Version

For the Crust:

  • 1 1/4 cups all-purpose flour
  • 1/4 teaspoon salt
  • 1/3 cup shortening
  • 4 - 5 tablespoons ice cold water

For the Filling:

  • 3/4 cup semisweet chocolate chips
  • 3 eggs, lightly beaten
  • 3/4 cup light-color corn syrup
  • 1/2 cup packed brown sugar
  • 1/4 cup butter, melted
  • 1/4 cup coffee liqueur (Kahlua)
  • 1 tablespoon all-purpose flour
  • 1 teaspoon vanilla
  • 1 cup chopped pecans, toasted

Preheat oven to 375 degrees F.

For the Crust: In a medium bowl, stir together all-purpose flour and salt. Using a pastry blender, cut in shortening until pieces are pea-size.

Sprinkle 1 tablespoon cold water over part of flour mixture; toss gently with a fork. Push to side of bowl. Repeat with additional cold water, 1 tablespoon at a time (4 to 5 tablespoons total), until all is moistened. Shape into a ball.

On a lightly floured surface, use your hands to slightly flatten dough. Roll dough from center to edge into a 12-inch circle.

Wrap pastry circle around rolling pin; transfer to a 9-inch pie plate. Ease pastry into pie plate without stretching it. Trim pastry to 1/2 inch beyond edge of pie plate. Fold under extra pastry. Crimp edge as desired. Do not prick pastry.

Sprinkle with the 3/4 cup chocolate chips.

For the Filling: In a medium bowl, combine eggs, corn syrup, brown sugar, melted butter, coffee liqueur, flour, and vanilla. Stir in the 1 cup chopped pecans. Slowly pour filling over chocolate pieces in bottom of crust.

Cover edge of pie with foil to prevent overbrowning. Bake for 30 minutes. Remove foil.

Bake about 10-30 (my pie took a total of 55 minutes to bake through- I just checked it every 10 minutes) minutes more or until edge is puffed and a knife inserted near the center comes out clean. Place on a wire rack and allow to cool completely. Cover and chill within 2 hours of baking until ready to serve. Serve cold or at room temperature.

Makes 8 servings.

Related Posts with Thumbnails