Wednesday, March 30, 2011

The Best I've Ever Had

I hope you'll forgive me for being absent for almost 2 weeks. It seems the time is just flying past me and before I know it, it's been 3 days, then 7, then 10 days and those m&m's cookies are still at the top of my blog. Even though they were delicious and colorful, I was getting tired of looking at them. How 'bout you? I had great intentions of updating sooner but this baby is sucking all the energy out of me. But I'm not complaining because I know how blessed I am to be carrying this miracle. All that means is that you'll hear a little less from me. But when I do blog, I can promise you it will be something good. Really good, like these Meyer lemon-lime bars.

I was going to share with you the birthday cake that I made for my FIL a couple weekends ago, but I made these a few days ago and they were so good they jumped to the top of the list. I made these for a friend as a "thank you". My friend, Lori, brought over some homemade sausage and chicken gumbo and white rice after I got back home from my surgery. After eating take-out for over a week, a homemade meal is just what we needed. Thank you Lori! I know she's a huge lemon fan so I made these especialy for her. But they made so many that I kept a few for myself too :-)

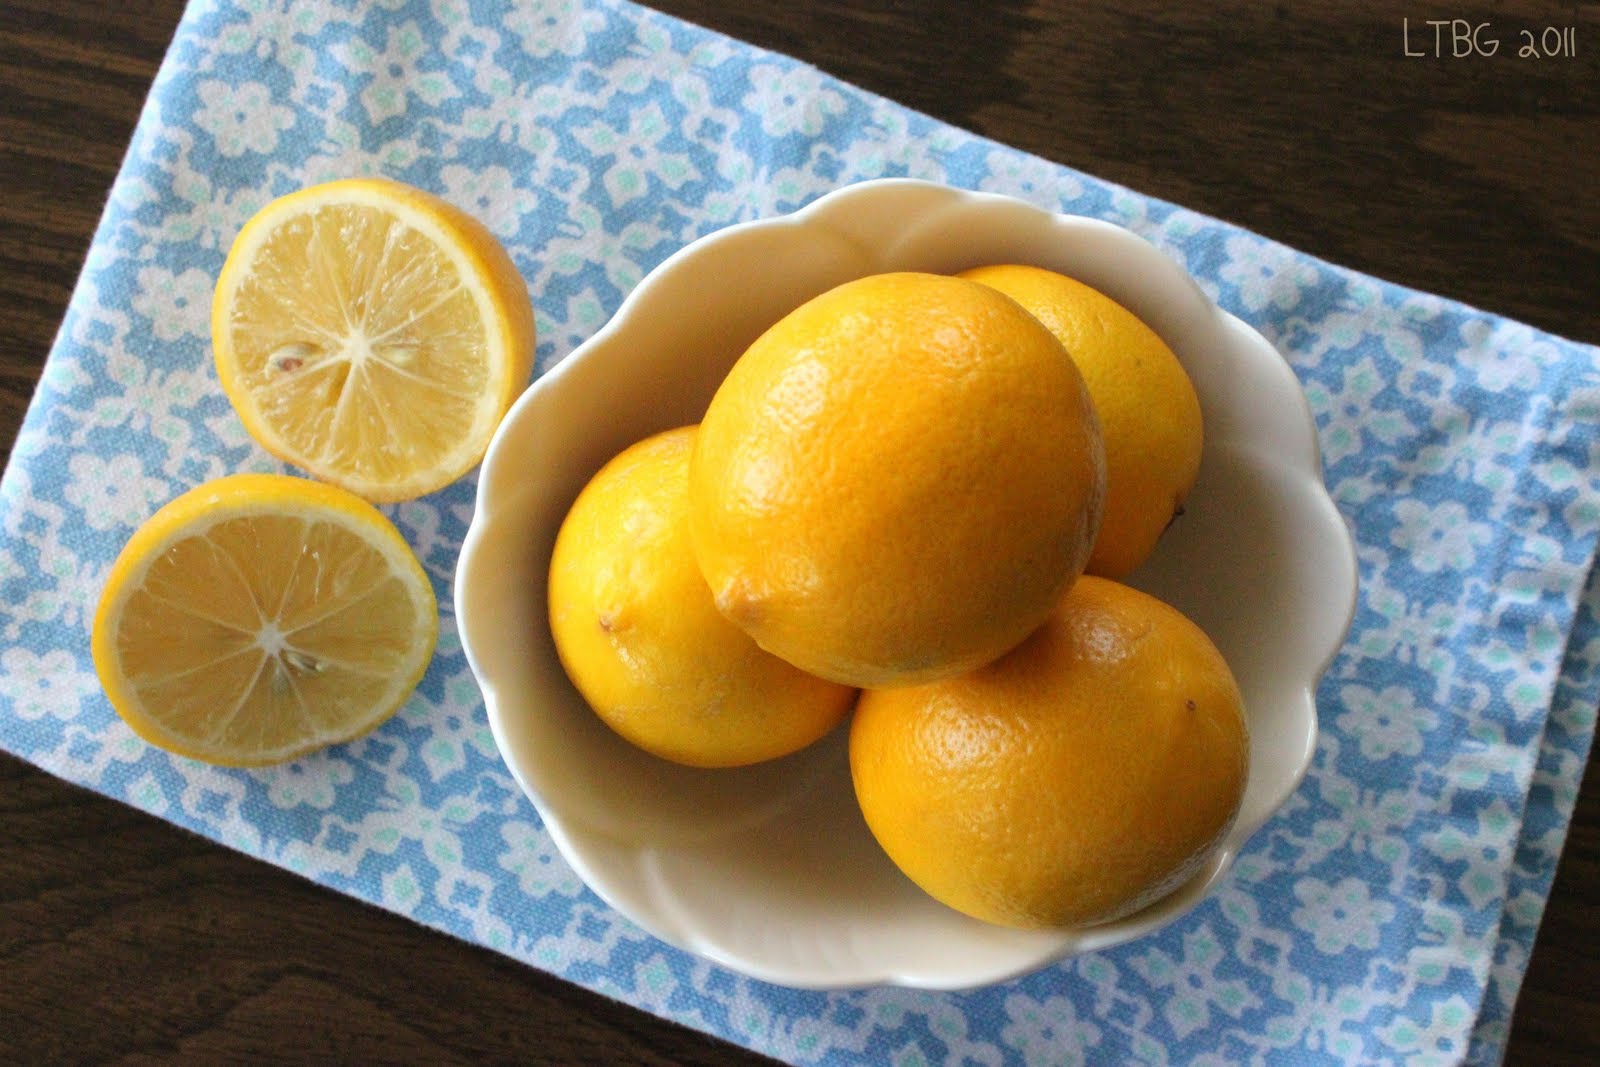
I used 6 Meyer lemons in this recipe, but I didn't quite have enough juice to make the recipe so I added the zest and juice of 2 Persian limes as well. If you've never had Meyer lemons before, they are a hybrid fruit- a cross between lemons and mandarins and aren't quite as tart as regular lemons. They have almost a floral fragrance to them and their skin is smooth, shiny and darker in color. Because they aren't as tart, the addition of the limes perked them up quite nicely. In my opinion they were they perfect combination of puckery citrus and sweet.

I've never made lemon bars before because I've never had one that I really liked. I know that should have made me want to make my own, but I never did. I just assumed they were all lousy and they weren't something I really liked even though I wanted to. But I was so wrong about that theory because I loved these bars. I saw this recipe on girlichef's blog. She raved about these bars and it intrigued me to make them almost immediately. These are a little thicker than the average lemon bar, they have a buttery shortbread crust and the filling is almost like lemon curd, dusted with sugar. If it means anything at all, I haven't had much of a sweet tooth lately, but I had 5 of these! Please make these and totally disregard the fact that they have 3 sticks of butter, 6 eggs and over 3 cups of sugar in them. That's what makes them so good!

Meyer Lemon-Lime Bars adapted from Ina Garten and girlichef

Printer Friendly Version

For the crust:

  • 3/4 lb. unsalted butter, at room temperature
  • 3/4 cup granulated sugar
  • 3 cup flour
  • 1/4 tsp. kosher salt

For the filling:

  • 6 large eggs, at room temperature
  • 3 cups granulated sugar
  • 1 Tbsp. finely grated Meyer lemon zest
  • 1 Tbsp. finely grated lime zest
  • 1 cup freshly squeezed lemon/lime juice (I used 6 small Meyer lemons and 2 limes)
  • 1 cup flour
  • Confectioners' sugar, for dusting

Butter a 9 x 13 x 2" baking pan, then line the bottom and sides of the pan with parchment paper. This is optional but will make removing the bars from the pan, much simpler.

For the crust: Cream the butter and sugar until light in the bowl of an electric mixer fitted with the paddle attachment.

Combine the flour and salt and, with the mixer on low, add to the butter mixture until just mixed.

Dump the dough onto a well-floured board and gather into a ball. Flatten the dough with floured hands and press it into the bottom of prepared pan.

Chill the pan while the oven preheats to 350° F.

Bake the crust for 15 to 20 minutes, until very lightly browned. Let cool on a wire rack. Leave the oven on.

For the filling: Whisk together the eggs, sugar, lemon and lime zest, lemon and lime juice, and flour.

Pour over the crust and bake for 35-45 minutes, until filling is set.

Let cool to room temperature. Cut into squares or triangles and dust with confectioners' sugar.

Store any leftovers in a covered container in the refrigerator.

Makes about 24 squares.

I just love this picture of my nosey little girl so I thought I'd share!

Friday, March 18, 2011

Cookie Monster Cookies and A Thank You

I have to tell you that as I read through the comments on my last post, I smiled, then I cried. I was so overwhelmed by you all and your kind words. I can honestly say that I felt and still feel, loved, supported and blessed. I thank you all so very much from the depths of my heart. I always knew there were wonderful people out there, I'm just thankful that I have you in my life. You have no idea what your words do for me. We are forever grateful for your prayers for us and this little one. Please keep them coming and thank you.

I haven't been baking much lately. I haven't had any morning sickness with this pregnancy (thank goodness!) and while it seems I wake up starving every morning, food doesn't really do it for me. I am eating, but portions are small. There have been a few cravings though, and a big fat salad was one of them. Go figure. There were also a few days where I wanted key lime pie and pineapple upside down cake, but after a slice I was done. I also haven't had much energy the past few weeks since the surgery to bake or cook or stand for longer than 20 minutes so these cookies are from last April.

I made these m&m cookies a while back for my father-in-law. He is a true cookie monster! And for some reason he keeps buying those under baked gummy ones from the grocery store bakery. They're really not that great but because they're convenient and he's not picky, he eats them. I've made these cookies before and they really are good so I decided to make a batch just for him. They're buttery and crisp, have great vanilla flavor and the m&m's are an added bonus. If I remember correctly, he ate them all by himself and did not share :-) This weekend is his birthday and while I won't be making these cookies for him, I will be making him a delicious birthday cake. Stay tuned for it.

Red's Ultimate M&M's Cookies from M&M

Printer Friendly Version

  • 1 cup butter or margarine, softened
  • 1/2 cup granulated sugar
  • 1/2 cup firmly packed light brown sugar
  • 1 large egg
  • 1 teaspoon vanilla extract
  • 2 cups all-purpose flour
  • 1/2 teaspoon baking soda
  • 1/8 teaspoon salt
  • 1- 12 ounce package M&M'S

Preheat oven to 350°F.

In large bowl, cream butter and sugars until light and fluffy; beat in egg and vanilla.

In medium bowl combine flour, baking soda and salt; blend into creamed mixture. Stir in M&M's.

Drop by heaping tablespoonfuls about 2 inches apart onto ungreased cookie sheets.

Bake 10 to 13 minutes or until edges are lightly browned and centers are still soft. Do not overbake. Cool 1 minute on cookie sheets; cool completely on wire racks. Store in tightly covered container.

NOTE: I like to section out the cookie dough with an ice cream scoop then I place the m&m's on top of the mounded dough before baking to ensure that the candy stays on top of the cookie. But feel free to mix the candy directly into the batter- it all tastes the same :-)

P.S. I am waaay behind on reading your blogs. Please be patient with me, but know that I will make it there soon, I promise. I miss you guys. Thanks for understanding but all this baby wants to do is sleep!

Friday, March 11, 2011

Purple, Green and Blue

When I see the contrasting colors of purple and green together they immediately remind me of my two sons' birthstones- Amethyst and Peridot. I did not make this bread because blueberries are purple and zucchini is green, but rather because I like the two flavors baked into sweet quick breads. I've never had the two together, but I really liked it and the crumble sent it over the top. Besides having fruit and veggies baked into one thing, topped with oatmeal, actually convinced me I was eating something healthy. I printed the recipe awhile back and didn't note where I got it from. I tried googling it to find it's origin with no such luck. If this is your recipe, let me know and I'll give you proper credit.

I also wanted to share with you a little about the "secret" anniversary trip Mr. H and I took this past weekend. We spent 5 nights and 4 days in New Jersey. What the heck in is New Jersey you might be asking yourself? Well my new found miracle of a doctor is there. On Friday morning I had abdominal surgery. We didn't take this trip for romantic reasons, but because we're trying to save our family. I am 12 weeks pregnant. If you'll recall, I've had 2 second trimester pregnancy losses in 2006 and 2007. We've been trying to conceive for the past 2 years and in December it finally happened. I didn't find out til January 15th and I've been keeping a secret from you all, not because I didn't want you all to know, but because I was scared.

The procedure I had was for placement of a Trans-Abdominal Cerclage (TAC). I have an incompetent cervix, which means that my cervix gives out and dilates under the weight of a growing baby, thus causing me to go into labor too early. Generally a cerclage is a stitch that is sewn through your cervix to keep it shut. But for me, it didn't work. This cerclage (TAC) was much more invasive and I had to have my abdomen cut open to have it done. The procedure is done much like a c-section, except that the baby is still growing inside my uterus and there wasn't a stitch placed through my cervix. This time a Mersilene band was tied tightly around my cervix just beneath the uterus. As the baby grows, the weight will be supported by this band. It's a permanent fixture in my body and this baby, as well as any in the future will be delivered via cesarean.

So the title of this post suggest that I have two heavenly babies with birthstone colors of purple and green and another miracle baby on the way due in September with a birthstone of Blue Sapphire. The colors in this bread reminds me all 3 of them. The TAC is 98-99% successful so we are optimistically hopeful that we will bringing a live baby home with us in a few months. We've waiting this for this for years and our time has finally come. That's also part of the reason that I've been so quiet lately. I really was sick for a while there, but the rest was from lack of appetite and energy. I am recovering at home now and will be for the next few weeks, but I promise to keep you all updated as I learn about the status of our growing and thriving baby. In the meantime, we are doing just fine and taking it one day at a time. I thank you all for the support you've shown me and I ask that you keep us in your thoughts and prayers. We know that we are not in the clear and I certainly do not take this pregnancy for granted. If anything, I realize how precious life really is because of the loss of our boys. I just want this time to be different.

Blueberry Zucchini Crumble Bread

For the Crumb Topping:

  • 6 Tbsp. brown sugar
  • 6 Tbsp. all-purpose flour
  • 1 teaspoon cinnamon
  • 1/8 cup oatmeal
  • 1 1/2 Tbsp. cold butter

For the Bread:

  • 2 eggs
  • 1/2 cup canola oil
  • 1 cup sugar
  • 1 teaspoon vanilla
  • 1 1/2 cups all-purpose flour
  • 1/2 teaspoon baking soda
  • 1/8 teaspoon baking powder
  • 1/2 teaspoon salt
  • 1 1/2 teaspoons cinnamon
  • 1/4 teaspoon nutmeg
  • 1 1/2 cups grated zucchini
  • 1 cup blueberries

To make the topping: In a medium bowl, mix brown sugar, flour, cinnamon and oatmeal. Using your fingers, blend the butter into the other ingredients until well mixed. Mixture will be crumbly but should stick together in clumps when you squeeze it. Set aside.

To make the bread: Preheat oven to 325 degrees F. Grease and flour a 9"x5" loaf pan. Set aside.

In a medium bowl, sift flour, baking soda, baking powder, salt, cinnamon and nutmeg. Set aside.

In a large mixing bowl, beat eggs with a whisk until slightly foamy. Add the oil, sugar and vanilla to the beaten eggs, and mix til well blended. Slowly add the dry ingredients to the wet until well incorporated, but do not overmix.

Using a spatula, fold in the grated zucchini and blueberries. Stir by hand until thoroughly combined but try and not break up the blueberries.

Sprinkle a 1/3 of the crumble mixture into the bottom of the greased and floured loaf pan. Carefully pour the batter into the pan and evenly sprinkle the remaining crumble topping over the batter. It's okay to have some some larger pieces of crumble on top of the bread.

Place the pan into a preheated oven and bake for 60-70 minutes or until a toothpick inserted in the center comes out clean. Allow to cool for about 20 minutes in pan before inverting onto a wire rack to cool completely.

And now for the winners of the Frame By Frame Baking Cookbook Giveaway!

#40- Becky and #62- LeAnne!

Congrats ladies! I'll email for your addresses. Enjoy the books!

Thursday, March 3, 2011

Citrus Love & A Cookbook Giveaway!

I mentioned in a recent post about Lemon-Lime Cream Pie, that we were going through cases of oranges from Costco like they were going out of style. They have just been so good this year, and as a midnight snack, Mr. H and I will peel two oranges and have those for dessert. Actually he does the peeling, I just do the eating :-) Our entire crisper drawer was filled to the brim with oranges so I decided to use a few to make this cake. I didn't even make a dent in our stash.

This cake comes from a cookbook I discovered last March called Frame By Frame Baking. It immediately appealed to me because it reminded me of step by step recipe blogs. There are step by step photos and instructions in this book so it's easy to follow along, but it's also visually appealing and the recipes are simple. The book has about 60 recipes sweet and savory recipes in it, and are divided into 4 categories- Cakes and Traybakes, Pastries, Small Cakes and Cookies, and Breads. There really is something for everyone in this book.

I liked this cake, but didn't love it. Firstly, I think I overbaked it a tad even though I followed the directions. It should have been taken out about 5 minutes prior to the time in the book and I have noted that in the recipe below. Because it was overbaked, it was a little on the dry side. Also, when you bake fresh oranges their flavor becomes bitter, like that of orange marmalade. I'm not a fan of orange marmalade but if you are, then you'll like this cake. Despite not loving this recipe, I'm sure there's another in this book with my name written all over it.

Also because this book was so appealing to me, I bought two extras, just for YOU! All you have to do is leave a comment on this post telling me about your favorite cookbook. That's it! Be sure you leave me your name and email in your comment so I can contact you if you win. If you leave an anonymous comment with no contact info, there will be no cookbook for you! Because I'm feeling generous, everyone is eligible to enter this giveaway. Mr. H and I are going away on a secret trip this weekend for our 6th wedding anniversary. I'll announce the winner when we return home. Hope everyone has a great week!

Orange Madeira Ring adapted from Frame By Frame Baking

Printer Friendly Version

  • 3/4 cup unsalted butter, plus more for greasing the pan
  • 2 Tbsp. dark corn syrup or Lyle's Golden syrup
  • 2medium oranges
  • 3/4 cup sugar
  • 3 eggs, beaten
  • 1 1/2 cups all-purpose flour
  • 1 tsp. baking powder
  • 1/4 tsp. salt
  • 1 Tbsp. finely grated orange zest
  • 2-3 Tbsp. orange juice

Preheat oven to 325 degrees F. Grease a tube/ring cake pan and spoon the syrup into the bottom.

Cut all the white peel and pith from the oranges and cut into slices.

Arrange the slices over the syrup in the pan.

Cream together the butter and sugar until pale and fluffy.

Gradually beat in the eggs, beating well after each addition.

Sift the flour into the mixture and fold it in gently with a rubber spatula. Add the orange juice and zest and fold in until a til a soft consistency is achieved.

Spoon the mixture into the pan and smooth the surface.

Bake in a preheated oven for 40-50 minutes or a toothpick inserted in the center comes out clean. Cake should be risen, golden and firm to the touch.

Cool in the pan for 10 minutes, then return out onto a wire rack to cool completely.

The cake can be served cold, or warm with extra corn or Golden syrup drizzled over it.

Ahh, citrus love!

Related Posts with Thumbnails